Showing posts with label comfort food. Show all posts

Hearty Italian Meat Sauce

>> Sunday, February 5, 2012

I'm mostly posting this recipe because my mother's been begging for it...

And I'm a slacker....

And I have good intentions... I really do!

But then I've been getting home from work exhausted, force myself out for a run, make dinner and crash!

So, sorry mom! I'll do better this time. I promise! :)

I made this with her when she came for a visit for 24 hours back in November. She was on a quick layover on her way out of the country to visit my sister, and we had to savor every minute we could get. I, unfortunately, couldn't get off work, so we really only had the evening together. I wanted to make it count - so of course the thing that I wanted to do together was cook. I wanted to get our hands together in the kitchen, one of the places that means the most to me, in order to enjoy every minute with her. I hadn't seen her since my trip to Italy, and the best way to tell some of the stories of the things we did is not over the phone, but in the reliving of what we did. The sweetness of the tomatoes and licorice smell of the basil brought me right back to the middle of Florence and the Centrale Market. It was the best way to let her know exactly what happened on the trip and for her to even experience a tiny piece of it herself - at least from my perspective.

That night, we made the meal together, talked and laughed, and moved out to the back patio with Archie. He made us a fire in my fire pit, and we sat at my little vintage patio table, savoring each bite, knowing we only had a little bit of time.

The meat sauce itself is so simple - using fresh ingredients from the Centrale Market when we were in the class in Italy. And even though I don't have a Centrale Market close by, I have tried to preserve the freshness as much as I can - basil from my back yard, meat from the local butcher, all adding up to make such tastiness, and causing there to be even more memories surrounding my yummy little Italian meat sauce.

P.S. - I apologize for the pictures of the final meat sauce not being so great - by the time the meal finished cooking it Italy, Jen and I were supposed to be on a train 10 blocks away in 20 minutes (plus meeting up with our husbands!). I'll work on getting a better picture. :)

P.P.S. - The fresh pasta (made by hand!!!) recipe to come shortly. You'll be surprised at how easy it is. No pasta roller needed!

Italian Meat Sauce (By: Chef Giovanni, Florence Italy) - serves 6

Ingredients:
6 tsp. Extra Virgin Olive Oil
6 cloves garlic
1 red onion
1 tsp chili pepper flakes
1 lb good quality ground beef
1 lb Italian pork sausage, casings removed (I used the sweet kind since there was already a kick from the chili pepper)
2 cups red wine
1 lb. can whole, peeled tomatoes
1-2 whole basil leaves per serving (approximately 6-12 leaves)
salt and fresh ground pepper to taste

Preparation:
1. Chop onion into small diced pieces and mince garlic

2. Place olive oil in pan and heat up. Place the onion, garlic and chili flakes into the heated oil and continue cooking until caramelized.

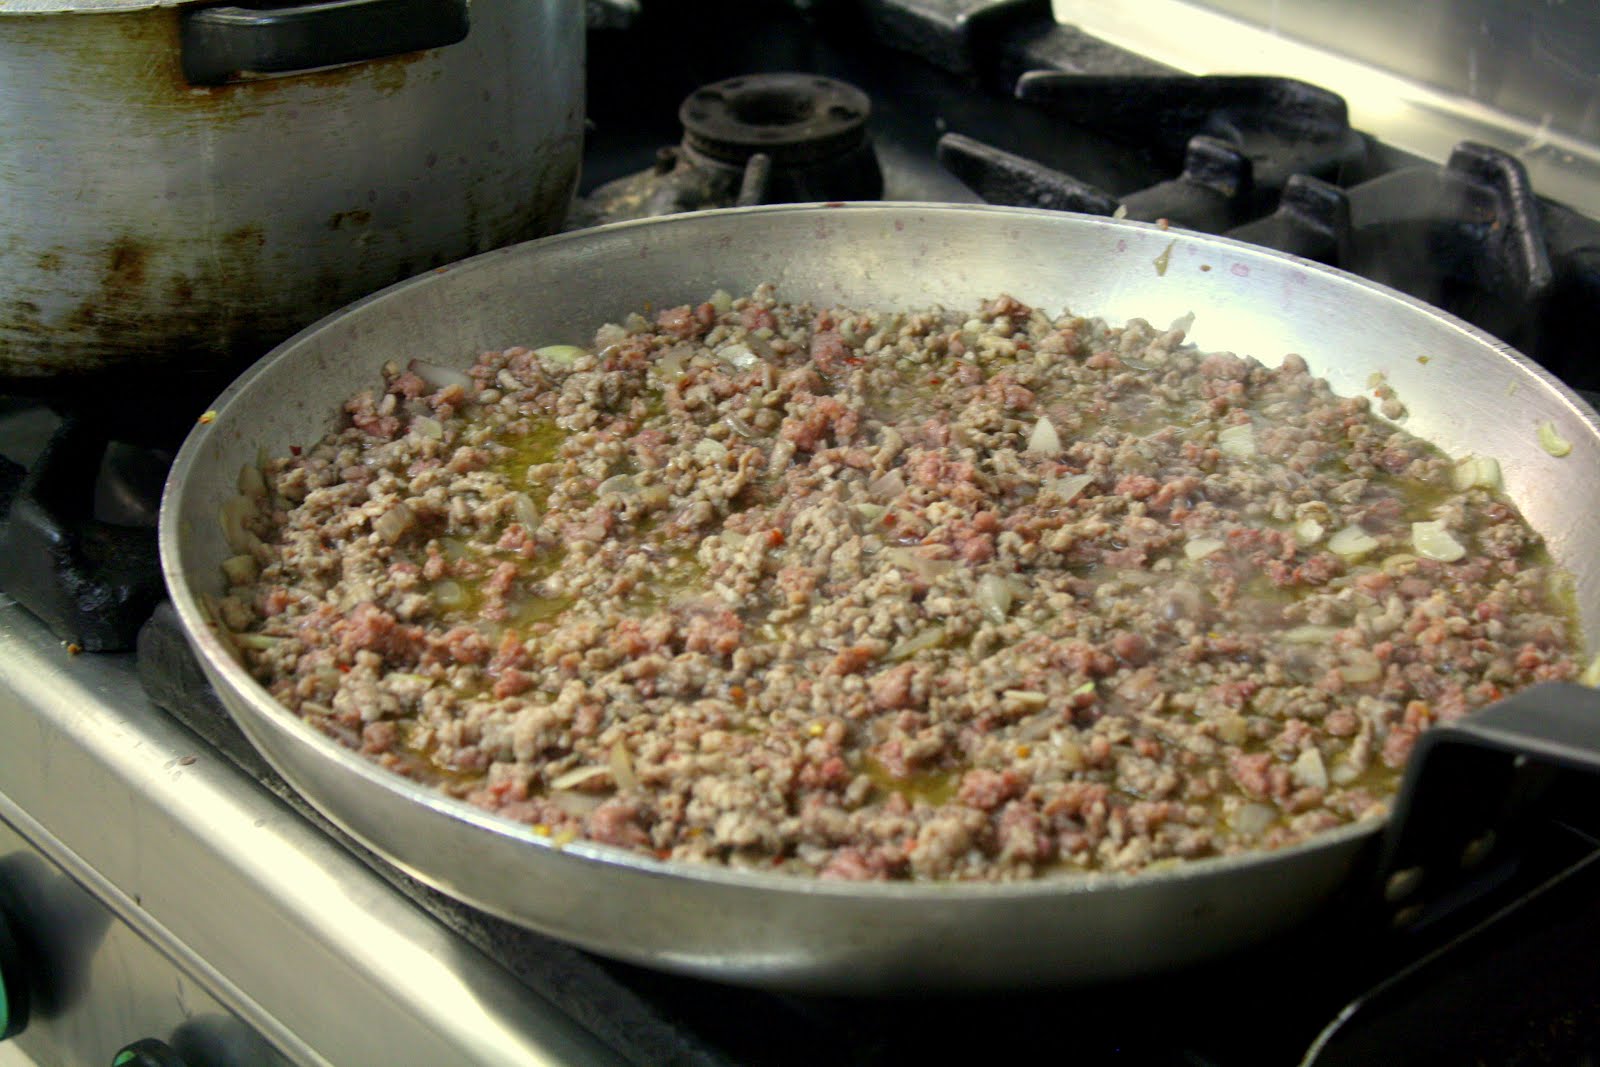
3. Place the pork sausage and ground beef into pan. Mash with a fork until all pieces are broken down, and meat is cooked through. DO NOT DRAIN!! I know.. weird, but don't do it.
Fresh from the butcher!
4. Add the 2 cups wine (plus another little drizzle if you like the taste ;) ), and allow to reduce by half - about 10-15 minutes depending on how high your heat works.

5. Drain juice of tomatoes into the pan and crush the whole tomatoes with your hand, creating pieces of smaller tomatoes. You can use a fork to make any a little smaller if they are still too big. Place basil in pot. Allow to simmer for at least 30 minutes. Serve with fresh, warm, homemade pasta!


Read more...

Memories

>> Monday, January 23, 2012

There is something about food that always seems to bring up memories. It's probably one of the things I like best about food.


Lots of people know me by my love for cooking, my love for food (not sure that's a good thing! ;)), and being the one who always wants to try a new recipe.

But really, at the heart of the matter, I actually always go back to the standbys. The foods that mean something to me. Yes, they sure are good, but they have heart behind them.

I'm sure right now you're thinking... she is insane. It's just food we're talking about here. But it's not!! The smell of orange cinnamon rolls can instantly remind me of being a child in my grandmother's kitchen in the summer. She would always make us orange rolls - and to this day, I have orange cinnamon rolls on Christmas morning. The kind from the can!

The taste of corn tortillas reminds me of my summer mission's internship in Mexico - and our favorite restaurant "The Hill". Their tacos with the cheese that you pulled with your fork was remarkable - but even more so was the amazing opportunity to share God's love with this country.

The cold and creamy taste of butter pecan ice cream instantly takes me back to my living room in high school. Watching television late at night with my dad after getting back from a basketball game on the bus was the perfect night treat. Both of us mostly sitting in silence from sheer exhaustion, but the time spent together was priceless.

And then there's these - Bacon wrapped water chestnuts. One of my favorite recipes of all time. Are they good? Absolutely! But I tend to think they are mostly as good as I think they are because of the memories they bring up. This is one of the first recipes I learned how to make from my mom. In fact - it's her recipe. I'm sure you could find some adaption of it pretty easily on the internet somewhere, but none of them taste quite like these.

It's the first recipe I mastered on my own, brought somewhere and got a really good response. They became my standby for a while - the only thing I would make because I knew I could make them well! Obviously, I've branched out since then.. but I remember my roots, and I remember standing by my mom as she taught me each step. And every time I taste one, the crunchiness of the water chestnut and the tanginess of the barbecue sauce, it reminds me of home!

What recipe or food do you have the conjures up the most memories?

Mom's Bacon Wrapped Water Chestnuts


Ingredients
1 lb bacon (cut in thirds)
2 small cans water chestnuts (break in half and stack on top of each other)
1 cup ketchup
2/3 cup brown sugar
1/2 tbs. lemon juice
toothpicks

Preparation
1. Cut bacon into thirds.
2. Wrap bacon around stacked water chestnuts and secure with a tooth pick. Place on baking tray in line leaving space between so they don't stick together.
3. Bake at 350 degrees for 25 minutes. Pour off the grease.
4. In a microwave safe bowl, mix together sugar, ketchup and lemon juice. Heat just until warmed in microwave (about 30 seconds).
5. Pour over water chestnuts evenly, trying to avoid the toothpick if possible (it will burn).
6. Bake an additional 30-35 minutes until bacon is crispy.


Read more...

Salted Caramel Chocolate Pretzel Bark

>> Saturday, December 17, 2011

It's been a really rough week!

You know the theory that bad things come in threes... well they came in four's and fives this week.

Life at work was insane! It wasn't just your typical, "Oh that was a really stressful week". No, it was pretty much terrible! Lots of things going on there, one of which include the word "restructuring", and it was really hard!

Then my husband got in a car accident this week. But the problem is, that he drives a '67 Ford Mustang. So, it's not like any other car, and we can just go ahead and have it fixed. It has to be taken to a specific car specialist, and we'll never be able to match the specific color it was painted, so it will just have to have black primer on it until we can afford to get the whole car repainted.
On top of the craziness, it was our 8 year anniversary this week - and I was way to stressed out to even remotely enjoy it. My poor hubby was busy trying to take care of me (this was before he wrecked his car! :) ), and we tried to enjoy dinner and our date as much as possible.

Yesterday, I was really down in the dumps! I was having myself a good ole' pity party about what a stressful and rough week it was, and it was Christmas time - my favorite time of the year, and now it felt ruined... and then I stopped dead in my tracks! Boy was I going down a really bad path, and I felt that oh so "GENTLE" nudge that I was so so wrong.
Christmas was not ruined because I was having a bad day - in fact, I think it was made better, because only when I am at the very bottom of myself can God be glorified, and then the true meaning of Christmas can really be portrayed. God is the God of peace, He is the God of comfort, He holds us in the midst of our sorrow, and in the middle of everything... He is on the throne.

I heard this song on the radio yesterday, it's one of my favorites we sing at SouthBay Church, and it has been my saving grace. Thought I would share with you.


This week, when I was at my craziest, I decided to make some comfort food in the form of chocolate. Don't worry, I only had one piece and took the rest to work! :) This pretzel bark is so good. It's kind of a twist on some of the bark that is out there at Christmas time. I love the mix of the flavors, and I love homemade caramel. It's really a very very tasty treat - and perfect for giving away to neighbors and friends in your Christmas goodie bags!

Salted Caramel Pretzel Bark (Adapted from Legume Loyalist via Pinterest):

Ingredients:
1 cup (2 sticks) unsalted butter
1 cup light brown sugar
bag of pretzel sticks (you won't need the whole bag)
8 oz. semi-sweet chocolate chips
4 oz. milk chocolate chips (recommend Guittard)
Fleur de Sel sea salt

Preparation:
1. Line a baking tray with foil and lightly brush on butter from one of the sticks - just barely cover. Preheat the oven to 400 degrees.

2. Place the butter in a saucepan over medium-low heat (if you have gas heat, really watch it, because it will get hot very fast). As the butter is melting, lightly break pretzel sticks up with hands and place evenly covering surface of foil-lined cookie sheet.
3. Once butter is melted, add the brown sugar and whisk until incorporated (this may take a few minutes - the butter once to stay separated). Allow the sugar and butter to simmer, but avoid letting the whole thing boil. It will be a big huge mess, and you'll have to do the whole thing again - take my word for it! :) Stir occasionally, about 3-4 minutes until it takes on a caramel consistency.

4. Pour the caramel mixture evenly over the pretzels, drizzling back and forth, using a spatula to even it out if you missed any spots. Bake in the oven 5-7 minutes.
5. While caramel is in oven, over a double boiler (saucepan filled with simmering water with a larger bowl on top. Remember not to let the bowl touch the water or you end up with burnt chocolate), place the chocolate. Continue to stir until its melted and smooth.
6. Pour the melted chocolate over the cooked caramel/pretzel mixture, again drizzling back and forth and using a spatula to spread to any missed spots. Sprinkle with the fleur de sel and place in refrigerator for approximately one hour to harden. Place on a cutting board upside down, pulling the foil off. Cut or break the sheet into smaller/bark like pieces.


Read more...

Eggnog Sugar Cookies

>> Tuesday, December 13, 2011


I know I've said this before... but California has to be the best state ever. It's not even my home state - where I was born and raised. But it sure does feel like "home" now. Archie and I LOVE to explore, and one of our favorite ways is hiking. There are so many places to go hiking here. This past weekend we went hiking with our hiking buddies, Jeremiah and Jenny. Here are a few pictures of our adventure at Big Sur.
How can you go hiking without an Iphone/GPS?

Can you say Christmas card?


We made a lunch stop at Big Sur Bakery. I've heard a lot about this place on other blogs, and loved being able to try it. It was a lunch menu, which was a bit smaller, but it was still delicious. I had a local ham sandwich with fresh baked bread and a chocolate chip macadamia nut cookie. Archie got a chai latte which was topped with honey and was delicious! If you're in the area, you should definitely try.

Now let's talk about cookies - because I know that's really why you're reading. It's Christmas time - and what better way to add thickness to the waste line but eggnog! Eggnog has such a varied fan base - some people love it and some people hate it. I'm surprised to see how many people haven't even tried it! My dad introduced me to eggnog, and I've been a fan ever since. I'm a traditionalist though - you can't enjoy it, not even one little sip, until after Thanksgiving! These cookies have just a hint of eggnog with more of a nutmeg flavor. Still delicious.

If you need a little help working off the eggnog, Pinterest has some great quick at home bootcamp workouts you can do in 30 minutes or less with little to no equipment - here and here.


Eggnog Sugar Cookies (From: BHG)


Ingredients:

For Cookies -
1/2 vanilla bean
1 1/4 cups butter, softened
1 cup sugar
1 1/2 teaspoons baking powder
1/2 teaspoon ground nutmeg
1/2 teaspoon salt
1 egg
1 tablespoon eggnog
3 1/4 cups all-purpose flour

For Icing
3 cups powdered sugar
1 teaspoon vanilla
4-5 tablespoons eggnog

Preparation:
1. Cut vanilla bean in half and scrape out seeds, setting them aside.
2. Using an electric mixer, mix softened butter on medium for 30 seconds or until fluffy. Add the sugar, baking powder, nutmeg and salt, and beat until combined, scraping the bowl as needed.
3. Beat in the egg, eggnog, and vanilla beans until combined. Mix in the flour - mixing as much as possible by the electric mixer, and switching to a wooden spoon to stir in remaining flour.

4. Divide the dough in half and wrap in plastic wrap, chilling for 1 hour. Preheat oven to 375 and lightly flour a work surface. Roll out the dough to approximately 1/4" thick.


5. Using a fluted round cookie cutter, cut out dough and place on cookie sheet lined with parchment paper. Bake in the preheated oven for 8-10 minutes or until edges are firm and bottoms are lightly browned. Transfer the cookies to a wire rack, and let cool.

For Icing:
Mix together all ingredients until spreadable consistency. Spread onto cooled cookies.

Read more...