Showing posts with label chocolate. Show all posts

Peppermint Bark

>> Thursday, December 13, 2012


I love to make Christmas treats. I look at recipes all year long in anticipation of which ones I'll make each year. Part of the joy of making all these treats is to give it away! One of my favorite things to do is to make gift baskets of homemade treats to give to friends, neighbors, and maybe keep a bit for myself too! 

This year, I'm going a little more low key since Baby Jackson is due any day now, and I want to make a few things in advance that will store for a bit, especially since some of these gift baskets this year will be going to the nurses at the hospital who will be helping me out - God Bless em! :) 


I made the traditional peppermint bark as one of the treats this year. It's so easy, there's no excuse to buy the store bought kind. And considering, with the cost being about $7.00 for an entire batch that can split into multiple servings - it's super affordable - way cheaper than the store bought stuff. And I can guarantee what kind of chocolate is in it - I went for the good stuff since the chocolate is the main ingredient. My favorite is Guittard chocolate. I know I've mentioned it on here before, and I think it's only available in California, but it's AMAZING, and totally worth it - even if you have to order it! :) 


Homemade Peppermint Bark - by Me


Ingredients: 
12 oz Guittard (or other high quality) semi sweet chocolate chips
12 oz Guittard or Ghiradelli white chocolate chips
1 Tbs. vegetable oil (only if needed)
approximately 12 mini candy canes or 6 regular ones

Preparation: 
Line a 9x13 pan with parchment paper or silpat. 

In a microwave safe bowl, place semisweet chocolate chips and microwave in 35-45 second increments, stirring after each heating until chocolate is completely melted. Pour and spread chocolate into prepared 9x13" pan. Place in freezer for approximately 20 minutes. 

While the chocolate is chilling, place candy canes in a ziplock bag and crush with a rolling pin or glass. 

When there is a few minutes left for the semisweet chocolate, melt the white chocolate in a microwave safe bowl in 30 second increments until smooth. If chocolate is not completely smooth, add 1 TBS vegetable oil until all smooth. Add about 1/4 of the candy cane mixture into the white chocolate and spread quickly onto chilled semisweet chocolate layer. Sprinkle the rest of the candy canes onto the top of the white chocolate and chill in freezer for an additional 20 minutes. 


Take out of freezer and turn over on cutting board. Use a knife or rolling pin and pound gently to break into pieces. Enjoy. 


Read more...

2nd Annual Blogger Cookie Swap - Nutmeg Browned Butter Chocolate Chip Cookies

>> Wednesday, December 12, 2012

I love cookies! and I love Christmas cookies! 

Because I love to be in a sugar coma from cookies starting December 1st through December 31st, I decided to once again participate in the Food Blogger Cookie Swap. This is my second year (and the cookie swaps second year), and it as always is so much fun. The anticipation of cookies coming in the mail is almost more than I can bear! :) 

Thank you to my awesome cookie swap matches! It's always so fun to learn about new bloggers. 
I got some yummy Ginger Molasses Cookies from Allix @ The NonPareil Baker
Sweet and delicious Oatmeal Cranberry white chocolate chip cookies from Kristen @ The Slender Kitchen
And perfectly chewy and unique deep dish chocolate chip cookies from Sarah @ Sensibly Sara


This year I decided to do a twist on my browned butter molasses chocolate chip cookies. These just went up a whole notch! I found a similar recipe to mine that got all crazy delicious in the Ruche holiday recipe guide

These cookies have a hint of coffee, a hint of nutmeg, sweetened condensed milk, and if all that weren't enough, you brown the butter for the most amazing flavor combination. They are intense, but wonderful... and I guarantee you won't be able to eat just one. 

So, I made them all, surprisingly got them all packaged up instead of eating them, and sent them to my matches. Even made a few for friends since they were so yummy. Packaging is half the fun in this cookie swap. Here's how I decided to package mine up this year - hope they made it ok! :)


Happy Cookie Swap! 


Nutmeg Browned Butter Chocolate Chip Cookies (Adapted from She Runs, She Eats - Ruche Holiday Recipes)


Ingredients
1 cup (2 sticks) unsalted butter, browned and cooled to room temperature
1 1/4 cup dark brown sugar
7 ounces sweetened condensed milk
1 egg, room temperature
2 teaspoons vanilla extract
2 1/2 cup flour
1 tbsp ground coffee
1 1/4 teaspoons baking soda
1 teaspoon kosher salt
1/2 teaspoon freshly grated nutmeg
1 1/4 cup milk chocolate chips

Preparation:
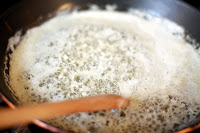
1. In a skillet, place butter and allow to melt. Keep cooking for a few minutes until most of the large foam bubbles disappear and butter is golden brown and nutty smelling. I know, very official. :) Remove from heat and allow to cool. 


2. In a large bowl, mix together coffee, flour, nutmeg, salt, and baking soda. Set aside. 


3. In a separate bowl, combine cooled browned butter and brown sugar until combined. Follow this with the sweetened condensed milk, egg, and vanilla. Continue to whisk until smooth. 


4. Stir flour mixture into butter/sugar mixture and continue stirring until all flour is completely mixed in. 


5. Mix in chocolate chips and stir until combined. Mixture will be thick. Refrigerate the dough for at least 30 minutes.


6. Preheat oven to 350. Roll about 1 1/2" balls of dough. Place on a cookie sheet with parchment paper approximately 1" apart, and press dough down until flattened. Bake cookies for ~13-15 minutes (depending on if you use a metal pan or not), until tops of cookies are crisp and slightly browned. Cool for 5 minutes on baking tray and transfer to cooling rack to complete cooling. 


Read more...

Guest Blog

>> Saturday, March 31, 2012

Hi there,

Vanilla Bean Can Cakes with Whipped Red Wine Ganache

I'm guest blogging today over at Everyday Desserts. Yay! First ever guest blog! :)

Over there, you will find out wonderful new things.... like how to make cakes in cans!

And how to whip ganache in order to make frosting! Oh yeah, and it has red wine in it!

And the secret to weight loss - okay I made that one up - I mean really, we're talking about cake here.

Hop on over and check out Angelyn's awesome blog and check out my post today.


Read more...

Peppermint Oreo Truffles

>> Monday, December 26, 2011

I hope you all had a wonderful Christmas!

We sure did around here. It was a relaxing day that was filled with a lot of blessings... and eating!

We weren't able to be with our family this year, but Skype and FaceTime has really made a difference in technology - and I was able to have conversations with family and friends from all over the world (Washington, South Carolina, and even China) via FaceTime and it was almost like being together - almost. My dad called on FaceTime from the terminal of the Atlanta airport on his way to visit family out of the country. He turned the phone around to show me the airport, and it was completely dead! I guess not many people fly internationally on Christmas day. Made it nice for him, he was getting on a 14 hour flight and there were lots of extra seats - Leg room, baby! ha

How was your Christmas? What did you do? I hope it was filled with blessings and love from your family, and hopefully your were able to set aside a time to quiet yourself and reflect on this season.

We spent some time with a great group of friends yesterday, enjoying the day together - and had a lot of fun. We decided to forego the large Christmas dinner idea so that nobody was spending the entire day in the kitchen, and went for a large pot of white chicken chili, salad, and yummy appetizers. Everybody pitched in and brought appetizers, dips, desserts, etc and we pretty much ate all day. It was divine! :)


One of the things I brought were these yummy peppermint Oreo truffles. They are so so good. They stay moist in the middle from the cream cheese, and they have just the slightest hint of peppermint flavor - not too overwhelming like a lot of peppermint flavored goodies. You could always increase or decrease the amount of peppermint candy used if you wanted to change it - or even omit it all together if you don't like peppermint. These are a great way to use up those candy cane Christmas tree decorations, and would make a really great New Year's Eve goody to bring for your parties. Hope you enjoy!

Peppermint Oreo Truffles (Adapted From: Kraft Recipes)


Ingredients:
~ 12 peppermint candies, divided
1 package Oreo cookies
1 8 oz. package cream cheese, softened
12 ounces dark (bittersweet) chocolate chips
2 tablespoons vegetable oil

Here's your lineup of what you'll need

Preparation:
1. Place cookies and 8 peppermint candies in a food processor, pulsing until completely crushed.
2. Place cream cheese in food processor with crushed cookie mixture. Pulse until it makes a batter, and all cookie crumbs are combined. Place mixture in fridge for 20-30 minutes or until chilled.


3. While chilling, place remaining peppermint candies in a ziploc bag and crush into smaller pieces with a meat mallet or rolling pin (you'll want bigger pieces, not fine dust)

4. Place chocolate chips and vegetable oil in a microwave-safe bowl, and melt in 30 second increments until completely smooth and melted.
5. Roll chilled cookie mixture into 1" balls and place on parchment paper lined cookie sheet.


6. Dip rolled cookie mixture into chocolate using a small fork, covering entire ball with chocolate. Take out and tap fork on edge of bowl a few times to tap off excess chocolate. Top with remaining peppermint candy pieces immediately after dipping before the chocolate dries.
7. Continue dipping process with all of the balls. Place in refrigerator to harden approximately 30 minutes.


Read more...

Salted Caramel Chocolate Pretzel Bark

>> Saturday, December 17, 2011

It's been a really rough week!

You know the theory that bad things come in threes... well they came in four's and fives this week.

Life at work was insane! It wasn't just your typical, "Oh that was a really stressful week". No, it was pretty much terrible! Lots of things going on there, one of which include the word "restructuring", and it was really hard!

Then my husband got in a car accident this week. But the problem is, that he drives a '67 Ford Mustang. So, it's not like any other car, and we can just go ahead and have it fixed. It has to be taken to a specific car specialist, and we'll never be able to match the specific color it was painted, so it will just have to have black primer on it until we can afford to get the whole car repainted.
On top of the craziness, it was our 8 year anniversary this week - and I was way to stressed out to even remotely enjoy it. My poor hubby was busy trying to take care of me (this was before he wrecked his car! :) ), and we tried to enjoy dinner and our date as much as possible.

Yesterday, I was really down in the dumps! I was having myself a good ole' pity party about what a stressful and rough week it was, and it was Christmas time - my favorite time of the year, and now it felt ruined... and then I stopped dead in my tracks! Boy was I going down a really bad path, and I felt that oh so "GENTLE" nudge that I was so so wrong.
Christmas was not ruined because I was having a bad day - in fact, I think it was made better, because only when I am at the very bottom of myself can God be glorified, and then the true meaning of Christmas can really be portrayed. God is the God of peace, He is the God of comfort, He holds us in the midst of our sorrow, and in the middle of everything... He is on the throne.

I heard this song on the radio yesterday, it's one of my favorites we sing at SouthBay Church, and it has been my saving grace. Thought I would share with you.


This week, when I was at my craziest, I decided to make some comfort food in the form of chocolate. Don't worry, I only had one piece and took the rest to work! :) This pretzel bark is so good. It's kind of a twist on some of the bark that is out there at Christmas time. I love the mix of the flavors, and I love homemade caramel. It's really a very very tasty treat - and perfect for giving away to neighbors and friends in your Christmas goodie bags!

Salted Caramel Pretzel Bark (Adapted from Legume Loyalist via Pinterest):

Ingredients:
1 cup (2 sticks) unsalted butter
1 cup light brown sugar
bag of pretzel sticks (you won't need the whole bag)
8 oz. semi-sweet chocolate chips
4 oz. milk chocolate chips (recommend Guittard)
Fleur de Sel sea salt

Preparation:
1. Line a baking tray with foil and lightly brush on butter from one of the sticks - just barely cover. Preheat the oven to 400 degrees.

2. Place the butter in a saucepan over medium-low heat (if you have gas heat, really watch it, because it will get hot very fast). As the butter is melting, lightly break pretzel sticks up with hands and place evenly covering surface of foil-lined cookie sheet.
3. Once butter is melted, add the brown sugar and whisk until incorporated (this may take a few minutes - the butter once to stay separated). Allow the sugar and butter to simmer, but avoid letting the whole thing boil. It will be a big huge mess, and you'll have to do the whole thing again - take my word for it! :) Stir occasionally, about 3-4 minutes until it takes on a caramel consistency.

4. Pour the caramel mixture evenly over the pretzels, drizzling back and forth, using a spatula to even it out if you missed any spots. Bake in the oven 5-7 minutes.
5. While caramel is in oven, over a double boiler (saucepan filled with simmering water with a larger bowl on top. Remember not to let the bowl touch the water or you end up with burnt chocolate), place the chocolate. Continue to stir until its melted and smooth.
6. Pour the melted chocolate over the cooked caramel/pretzel mixture, again drizzling back and forth and using a spatula to spread to any missed spots. Sprinkle with the fleur de sel and place in refrigerator for approximately one hour to harden. Place on a cutting board upside down, pulling the foil off. Cut or break the sheet into smaller/bark like pieces.


Read more...