A Vacation for the Soul

>> Saturday, November 13, 2010


I'm a "have a few close friends" kind of girl.

I think it's just my personality.

My husband is the type of guy who jokes about going into a group of people and yelling out "who wants to be my friend", said with a jovial tone of voice, as in almost mocking anyone who wouldn't want to befriend him.

I've somewhat tried this approach, but it ends up in me inviting multiple girlfriends over to my house in order to get to know a bunch of people, and then no one showing up, equaling me feeling like a complete loser!


So, it turns out, that I'm better at meeting people one on one, and getting to know them, and having a few close friends rather than a bunch of acquaintances. It takes away my awkwardness - or at the very least reduces it! :)

Over the years, I have developed a handful of these type of relationships - girls who I would consider "Soul Sisters". The types who I could call at any time of day or night and share just about anything with. Friends who we can call at 4pm on a weekday afternoon, and invite to the movies at 7, full well knowing we all have to work the next day. You know, the ones you stand in the parking lot with for an hour after you just spent two hours having coffee, and laugh so hard you have to go back into the coffee shop to go to the bathroom.


When we went to Charleston a few weeks ago, I was able to spend some MUCH needed time with 3 of these "Soul Sisters". Christi invited us up (or we invited ourselves up) to their gorgeous home, and we were able to spend the weekend with them. It's so good for the soul to see friends who accept you for you who are, love you despite your many flaws, and know you well enough that you can catch up like it was yesterday the last time you saw them.

Christi is one of these friends! She is also an amazing cook!!! I keep trying to get her to do a guest post for me! She also has a catering business that she does on the side of her very busy life with her mom. So, seeing how she loves to cook, and I love to cook, and we frequently swap recipes and such, it was only appropriate that we go ahead and spend some time in the kitchen together when I was there.

Isn't she beautiful!!! :)


Having some fun in the corn maze!

She frequently makes these cinnamon rolls, so I got to jump in and learn how to make them, and let me tell you.... they are the creme de la creme of cinnamon rolls. Perfect for the fall weather with the hint of maple in the icing. The bread of the cinnamon roll is the best I've ever had. Crispy on the outside and soft and gooey on the inside! These are definitely a labor of love, but SOO worth the effort. I seriously have never had a cinnamon roll that tasted better in my entire life.
So, here's a little glimpse into my vacation for my soul! :)

CINNAMON ROLLS: (By: Christi Brownlow, Adapted from: The Pioneer Woman)
Ingredients: (WARNING!!! This recipe makes seven pans of 8 rolls each!)
For Rolls -
1 quart whole milk
1 cup vegetable oil
1 cup sugar
2 packages Active Dry Yeast
8 cups (plus 1 cup extra, separated) All-purpose flour
1 teaspoon (heaping) Baking Powder
1 teaspoon (scant) Baking Soda
1 Tbs. (heaping) Salt
Plenty of melted butter
2 cups sugar
Generous Sprinkling of cinnamon

For Maple Frosting:
1 bag powdered sugar
2 teaspoons maple flavoring
1/2 cup milk
1/4 cup melted butter
1/4 cup brewed coffee
1/8 tsp. salt

DIRECTIONS: (I don't have pictures of the first steps - because Christi woke up before the crack of dawn to prep for us! :) )

Mix the milk, vegetable oil and sugar in a pan. Scald the mixture (heat until just before the boiling point). Turn off the heat and leave to cool 45 min to 1 hour. When the mixture is lukewarm to warm, but NOT hot, sprinkle in both packages of Active Dry Yeast. Let this sit for a minute. Then add 8 cups of all-purpose flour. Stir mixture together. Cover and let rise for at least an hour.

After rising for at least one hour, add one more cup of flour, the baking powder, baking soda, and salt. Stir mixture together. You can cover and refrigerate the dough if making in advance for a day or two at this point, just punch down the dough as needed so it doesn't overflow over the pan.

When ready to prepare rolls: Sprinkle rolling surface with a generous amount of flour. Take half the dough and form a rough rectangle.

Then roll the dough thin, maintaining a general rectangle shape, about 30 inches.

This is my dough
This is Christi's much prettier dough!

Drizzle 1/2 to 1 cup melted butter over the dough.

Don't be afraid to get your hands messy!

REAL messy!

Now sprinkle 1 cup of sugar over the butter followed by a generous sprinkling of cinnamon.
It's best to run a spatula under all edges of the rectangle at this point to make sure they aren't stuck to the surface.
Now, starting at the opposite end, begin rolling the dough in a neat line toward you, keeping it nice and tight. Pinch the seam of the roll at the top to seal it in. Push the ends together just a touch to keep contents in a little.
Spread 1 tablespoon of melted butter in a seven inch round foil cake or pie pan. Then begin cutting the rolls approximately 3/4 - 1 inch thick and lay them in the buttered pans. Christi used the technique of starting in the middle, then halving that, and again quartering that. This worked out well so you know you got enough of the rolls out of the log.
Repeat the process with the other half of the dough. Let the rolls rise for 20-30 minutes in pan, and then bake at 400 degrees until light golden brown, about 15-18 minutes.

Our Super Lu who saved the day! He's too cute I just had to add him!

For Frosting:
While the rolls are rising and baking, mix together all the ingredients listed and stir until smooth.
Frosting should be very thick, but pourable. Taste and adjust as needed. Generously drizzle over the warm rolls! YUMMMM!!!

Read more...

And the Winner Is....

>> Monday, November 1, 2010


We have a Halloween winner! :)


meeyeehere, October 31, 2010 6:19 AM

I would get a couple spring form pans!
jacksoncrisman@yahoo.com


Congratulations, I will be contacting you on how to claim your prize!

I have some new yummy recipes coming up this week!!!


Read more...

Whole Wheat Pumpkin Bread

>> Saturday, October 30, 2010

First of all... If you haven't entered my CSN stores giveaway for a $35 gift card - GO ENTER now!!


I have a confession... I have a couple shows on tv right now that I love to watch when I'm home alone. Mostly, because I know that the husband would probably just make fun of me for watching it if he was home with me.

One of them is Giuliana & Bill on the Style Network. I love it. I know, it's a stupid show, but I can't stop watching it!!! When I flew back from Charleston a few weeks ago, I watched it on the flight, and kind of got slightly addicted to it. Giuliana is one of the anchors on E News, and it's a whole reality style show about them trying to get pregnant, blah blah blah. I don't want to ruin too much of it, so you can go watch it... Shh, don't tell my husband, he might make fun of me! :)

What's your show you watch that you don't tell anyone you watch? :)
As promised, I am sharing my favorite pumpkin bread recipe. I've been making this for a few years, but I switched it up just a little bit this year, and added a cream cheese layer to the middle - which really made a nice addition to this crumbly bread. It's sweet, but not too sweet, has a nice nutty flavor because of the whole wheat flower, and goes perfect with fall. And you can even say it's good for you since it's made with whole wheat flour!!! Score!

Go make some for Halloween!
Whole Wheat Pumpkin Cream Cheese Bread (By Me - & cream cheese layer adapted by: Joy of Baking)
Ingredients: Makes 1 loaf
Bread:
1 1/2 cups brown sugar
2 eggs
1 cup pumpkin puree (not pumpkin pie filling)
1/2 cup butter, melted
1 1/4 cup whole wheat flour
1 cup bread flour (all purpose flour will also work)
1/4 tsp. baking powder
1 tsp. baking soda
1/2 tsp. salt
1/2 tsp. nutmeg
1/2 tsp. cinnamon

Cream Cheese Filling:
4 oz. cream cheese, softened
1/4 cup white granulated sugar
1 large egg
1/2 Tbs. + 1/4 Tbs. all-purpose flour

Directions:
Cream together brown sugar and eggs.
Add pumpkin and melted butter and beat well.

Add remaining ingredients and beat well.
In a separate bowl, using a hand mixer or food processor, mix cream cheese and sugar until smooth and creamy.
Add the egg, and blend until creamy
Stir in the flour
Pour half the batter into a loaf pan.
Pour the cream cheese filling over the half of the batter evenly. Some may run to the sides, so it's helpful to get the batter on the bottom as even as you can.
Spoon the remaining batter on top of the cream cheese filling, being careful that it doesn't mix in together, and smooth carefully over top.
Bake at 350 degrees for approximately 1 hour and 10 minutes or until knife goes in middle and comes out smooth.

Read more...

Hip Hip Hooray... My Second Giveaway!

>> Tuesday, October 26, 2010

I'm so excited... as I promised, CSN stores contacted me to do a SECOND giveaway!!!


They are an awesome online store that let's you choose from just about anything! ‘CSN Stores has over 200 online stores where you can find anything you need whether it be a stylish handbag, a chic bar stool or even cute cookware!’ You can stock up your kitchen with the most up to date kitchen tools, or you can deck out your closet with super hip clothes. I'm currently looking for a leather tote that doubles as a laptop bag! I'm sure I'll find something on CSN.

So, what do you win?? A $35 gift card to use towards whatever purchase you'd like to in any of their stores. What an awesome Halloween treat!

So here's what you have to do to enter. One entry for each comment, but please leave separate comments for each - other wise it will only be counted for one entry! Sorry!

1. Become a follower and leave me a comment letting me know you stopped by.

2. Head over to CSNstores.com, check out the websites, and let me know what you would get with your gift card

3. Post this giveaway on your blog!

That's it! Remember each separate entry counts for one, but leave a separate comment!

Contest ends on 10/31/10 - HALLOWEEN at midnight PST. Good Luck!

Read more...

I Love Fall!

>> Saturday, October 23, 2010

Fall is my FAVORITE time of year!!


I love the leaves turning colors, the crispness in the air, the smell of bon-fires, sitting by a fire, hot chocolate, pumpkins, and everything else about fall.

One of my favorite times in the fall is Halloween. Ever since I was in high school, I have loved sitting at home on Halloween night, watching a movie, sipping hot cocoa (if it was cold enough in Charleston :) ) and passing out candy to the trick or treaters. I loved seeing all the costumes, oohing and aahhing over the little babies dressed up so the parents can eat their candy, and telling the teenagers not dressed up so they don't get any candy! :) My favorite ever costume that has come through was a 6 month old baby dressed up as a Hershey's kiss! SOO cute. And she was an only child! ha.

My husband supports my love for fall! Being the wonderful guy he is, he knows I'm a sap, and can't get enough of fall fun, so he endures taking me to pumpkin patches like I'm a child, carves a pumpkin for us every year, and deals with the fall decor in the house, only mentioning that "it looks like fall threw up in our living room" when I really go overboard!

On the first day of fall, he always buys me a card to celebrate, and this year was no exception - he even bought be a fall themed bouquet of flowers. :)
With all the candy corn, red and orange, pumpkin bread (my favorite recipe coming soon!), and gingerbread lattes going around, I happened to notice Peet's had some pumpkin caramels. I didn't want to spend the $10 bucks they were selling them for in the store, so I decided to make them. I have a favorite salted caramel recipe, so I tweaked it a bit to add the pumpkin for a nice fall twist. The texture was a bit different than I imagined them to be, but they were AWESOME!

What's your favorite season??

A few notes for making them -
*the texture of these makes the dipping a bit harder, so I recommend refrigerating them to get them nice and set, then cutting them and dipping them in chocolate to get better squares.

*You will need a candy thermometer to get the caramels at the right temperature

*Try not to make these on a day when your house will be 98 degrees because it's 106 degrees outside - because they will not set. And then your caramels will look like poop blobs! :)

* The best way to temper chocolate is to use a heating pad set at medium - No work, no fuss, and you don't have to watch it - it stays at 110 degrees by itself.

Pumpkin Caramels (Adapted from: Recchiuti Confections & Tasty Kitchen):
Ingredients:
1 1/4 cups brown sugar
1 cup light corn syrup
1 cup heavy cream
1/2 cup butter
2/3 cup pumpkin puree
1 tsp. vanilla
1/2 tsp. Fleur de Sel salt plus more for sprinkling
22 oz. dark chocolate (61-70%), tempered at 110 degrees.

Directions:
Line the bottom of an 8 inch square baking pan with parchment paper. Lightly coat the paper and sides of pan with flavorless vegetable oil. DON'T SKIP this step - it will make a mess.
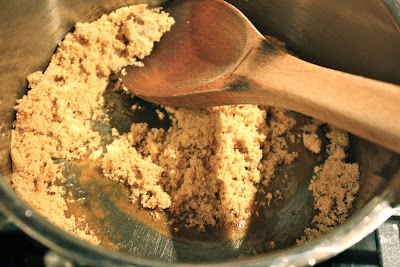
Cook the sugar in a heavy saucepan over high heat, stirring occasionally with a wooden spoon.
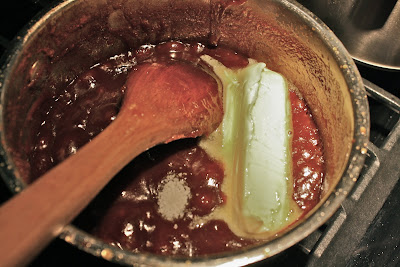
While the sugar is cooking, place cream in a sauce pan and bring to a scald. When the sugar has reached a deep-amber color, remove from heat and carefully add scalded cream, corn syrup, and pumpkin puree.
Return to heat and cook mixture until 252 degrees. After mixture has reached temperature, remove from heat and stir in butter and salt.

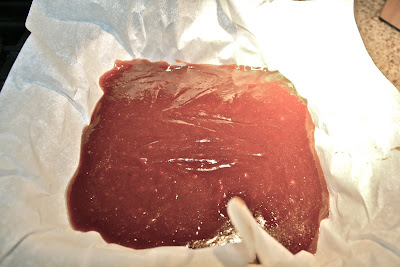
Pour into pre-lined baking pan, let stand for 2-3 hours or overnight until cool and firm.
This is what it looks like when it's 100 degrees in your house. Poop!
Temper the chocolate in a saucepan and dip cut squares in chocolate. Place on parchment paper until dry. Sprinkle with remaining Fleur De Sel.

Read more...