Peppermint Bark

>> Thursday, December 13, 2012


I love to make Christmas treats. I look at recipes all year long in anticipation of which ones I'll make each year. Part of the joy of making all these treats is to give it away! One of my favorite things to do is to make gift baskets of homemade treats to give to friends, neighbors, and maybe keep a bit for myself too! 

This year, I'm going a little more low key since Baby Jackson is due any day now, and I want to make a few things in advance that will store for a bit, especially since some of these gift baskets this year will be going to the nurses at the hospital who will be helping me out - God Bless em! :) 


I made the traditional peppermint bark as one of the treats this year. It's so easy, there's no excuse to buy the store bought kind. And considering, with the cost being about $7.00 for an entire batch that can split into multiple servings - it's super affordable - way cheaper than the store bought stuff. And I can guarantee what kind of chocolate is in it - I went for the good stuff since the chocolate is the main ingredient. My favorite is Guittard chocolate. I know I've mentioned it on here before, and I think it's only available in California, but it's AMAZING, and totally worth it - even if you have to order it! :) 


Homemade Peppermint Bark - by Me


Ingredients: 
12 oz Guittard (or other high quality) semi sweet chocolate chips
12 oz Guittard or Ghiradelli white chocolate chips
1 Tbs. vegetable oil (only if needed)
approximately 12 mini candy canes or 6 regular ones

Preparation: 
Line a 9x13 pan with parchment paper or silpat. 

In a microwave safe bowl, place semisweet chocolate chips and microwave in 35-45 second increments, stirring after each heating until chocolate is completely melted. Pour and spread chocolate into prepared 9x13" pan. Place in freezer for approximately 20 minutes. 

While the chocolate is chilling, place candy canes in a ziplock bag and crush with a rolling pin or glass. 

When there is a few minutes left for the semisweet chocolate, melt the white chocolate in a microwave safe bowl in 30 second increments until smooth. If chocolate is not completely smooth, add 1 TBS vegetable oil until all smooth. Add about 1/4 of the candy cane mixture into the white chocolate and spread quickly onto chilled semisweet chocolate layer. Sprinkle the rest of the candy canes onto the top of the white chocolate and chill in freezer for an additional 20 minutes. 


Take out of freezer and turn over on cutting board. Use a knife or rolling pin and pound gently to break into pieces. Enjoy. 


Read more...

2nd Annual Blogger Cookie Swap - Nutmeg Browned Butter Chocolate Chip Cookies

>> Wednesday, December 12, 2012

I love cookies! and I love Christmas cookies! 

Because I love to be in a sugar coma from cookies starting December 1st through December 31st, I decided to once again participate in the Food Blogger Cookie Swap. This is my second year (and the cookie swaps second year), and it as always is so much fun. The anticipation of cookies coming in the mail is almost more than I can bear! :) 

Thank you to my awesome cookie swap matches! It's always so fun to learn about new bloggers. 
I got some yummy Ginger Molasses Cookies from Allix @ The NonPareil Baker
Sweet and delicious Oatmeal Cranberry white chocolate chip cookies from Kristen @ The Slender Kitchen
And perfectly chewy and unique deep dish chocolate chip cookies from Sarah @ Sensibly Sara


This year I decided to do a twist on my browned butter molasses chocolate chip cookies. These just went up a whole notch! I found a similar recipe to mine that got all crazy delicious in the Ruche holiday recipe guide

These cookies have a hint of coffee, a hint of nutmeg, sweetened condensed milk, and if all that weren't enough, you brown the butter for the most amazing flavor combination. They are intense, but wonderful... and I guarantee you won't be able to eat just one. 

So, I made them all, surprisingly got them all packaged up instead of eating them, and sent them to my matches. Even made a few for friends since they were so yummy. Packaging is half the fun in this cookie swap. Here's how I decided to package mine up this year - hope they made it ok! :)


Happy Cookie Swap! 


Nutmeg Browned Butter Chocolate Chip Cookies (Adapted from She Runs, She Eats - Ruche Holiday Recipes)


Ingredients
1 cup (2 sticks) unsalted butter, browned and cooled to room temperature
1 1/4 cup dark brown sugar
7 ounces sweetened condensed milk
1 egg, room temperature
2 teaspoons vanilla extract
2 1/2 cup flour
1 tbsp ground coffee
1 1/4 teaspoons baking soda
1 teaspoon kosher salt
1/2 teaspoon freshly grated nutmeg
1 1/4 cup milk chocolate chips

Preparation:
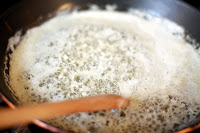
1. In a skillet, place butter and allow to melt. Keep cooking for a few minutes until most of the large foam bubbles disappear and butter is golden brown and nutty smelling. I know, very official. :) Remove from heat and allow to cool. 


2. In a large bowl, mix together coffee, flour, nutmeg, salt, and baking soda. Set aside. 


3. In a separate bowl, combine cooled browned butter and brown sugar until combined. Follow this with the sweetened condensed milk, egg, and vanilla. Continue to whisk until smooth. 


4. Stir flour mixture into butter/sugar mixture and continue stirring until all flour is completely mixed in. 


5. Mix in chocolate chips and stir until combined. Mixture will be thick. Refrigerate the dough for at least 30 minutes.


6. Preheat oven to 350. Roll about 1 1/2" balls of dough. Place on a cookie sheet with parchment paper approximately 1" apart, and press dough down until flattened. Bake cookies for ~13-15 minutes (depending on if you use a metal pan or not), until tops of cookies are crisp and slightly browned. Cool for 5 minutes on baking tray and transfer to cooling rack to complete cooling. 


Read more...

Pumpkin Loaf Cookies with Brown Butter Frosting

>> Sunday, November 18, 2012

If you've read my blog for awhile, you know I love the fall - and this fall seems to be flying by in rapid speed! 

With baby Jackson due in just FOUR short weeks - yes you read that right - four weeks... I feel like I'm having to wrap up fall and start getting ready for Christmas early. 

I usually  have a very steadfast rule in my house - no Christmas music, no Christmas movies, no decorations, not even eggnog until after Thanksgiving. But when I was grocery shopping last week and saw that the Christmas colored M&M's were out, I BARELY contained myself to not pick them up. :) I feel like I'm running out of time! I'm determined to celebrate Thanksgiving though and be thankful for every blessing from God this year - especially Baby Jackson! 

As his due date is getting closer, for the first time in the whole pregnancy, I'm really feeling the effects of being pregnant. For the most part, I did't really have any major side effects that effected daily life for me. I did have an IT band injury related to body changes that made me have to stop running at 7 months, but really, I made it to 7 months still running- that's really not bad. I just switched the routine to elliptical workouts and swimming, and it's been great. However, between having an attack of tachycardia, the overall 3rd trimester tiredness, and showing small signs of pregnancy induced hypertension, it's starting to feel pretty real and I have to say that I'm really looking forward to meeting him! 

Somehow, I found time to savor the fall for just a bit and make some yummy cookies that exploded with fall flavor. :) These are originally called pumpkin cookies - but I renamed them pumpkin loaf cookies because of their texture. They are soft and light, and literally remind me of biting into a piece of pumpkin loaf in the shape of a cookie. Add the browned butter buttercream frosting on top, and it's pure fall-flavored perfection. 

What's your favorite way to make fall last? 


Pumpkin Loaf Cookies with Brown Butter Frosting (From Martha Stewart)

Ingredients:
  • For The Cookies
    • 2 3/4 cups all-purpose flour
    • 1 teaspoon baking powder
    • 1 teaspoon baking soda
    • 1 1/4 teaspoons coarse salt
    • 1 1/2 teaspoons ground cinnamon
    • 1 1/4 teaspoons ground ginger
    • 3/4 teaspoon ground nutmeg
    • 3/4 cup (1 1/2 sticks) unsalted butter, softened
    • 2 1/4 cups packed light-brown sugar
    • 2 large eggs
    • 1 1/2 cups canned solid-pack pumpkin (14 ounces)
    • 3/4 cup evaporated milk
    • 1 teaspoon pure vanilla extract
    For The Icing
    • 4 cups confectioners' sugar, sifted
    • 10 tablespoons (1 1/4 sticks) unsalted butter
    • 1/4 cup plus 1 tablespoon evaporated milk
    • 2 teaspoons pure vanilla extract

Preparation: 
For the Cookies: 
1. Preheat oven to 375 degrees. Mix together dry ingredients - flour, baking powder, baking soda, salt, cinnamon, ginger, and nutmeg and set mixture aside. 


2. Beat butter and brown sugar with an electric mixer on medium speed for approximately 3 minutes or until light and fluffy. Mix in eggs and then reduce the speed to low. Add in the rest of the wet ingredients - pumpkin, evaporated milk, and vanilla and mix until well combined. Slowly add in the flour mixture, mixing until combined. Dough will be pretty wet. 


3. Transfer dough to a cookie piper or ziplog bag with the end cut off. Pipe 1 1/2" rounds on a baking sheet spread with parchment paper or silpat. Bake for 12 minutes or until cookies are cooked through. Allow to cool on a wire rack. 


For Frosting:
1. Melt the butter in a small saucepan until golden brown, foam disappears, and a slight nutty smell emerges - approximately 3-5 minutes. Pull off heat and allow to cool for a few minutes. 


2. In a large bowl, mix confectioner's sugar, browned butter (making sure to scrape all the browned bits from the pan), evaporated milk and vanilla. Stir until smooth. When cookies are cool, spread frosting on tops. 


Read more...

The Great Food Blogger Cookie Swap 2012

>> Thursday, October 25, 2012

Yep, that's right... I just signed up for the 2012 Cookie Swap. Last year was so much fun that I had to do it again. CAN'T WAIT!!

Basically, you sign up, make a few batches of cookies, ship them to some amazing bloggers, and get THREE amazing batches from other bloggers. And this year, they're doing something amazing and donating money to Cookies for Kid's Cancer.

If you want you can sign up too!


Read more...

Red Velvet Puppy Chow

>> Sunday, August 19, 2012


Hello there.

I know it's been quite a while.

Unfortunately for you, but fortunately for me, I haven't gotten rid of my sweet tooth.

So you're going to have to endure some sweet recipes. I actually have a pile of them lined up.

I promise eventually I'll get back to posting other things... like fruit... and veggies!! I do finally have a taste for some of that stuff again thank goodness. However, I hate going grocery shopping, because I still just want to buy ice cream, potato chips, and cookies. Oh, and don't forget chicken nuggets.

I'm posting a new belly picture, but I'm warning you, it's got great. I actually took it of myself (hence me holding the cell phone! :) ) to show my out of town husband that my belly had LITERALLY grown overnight. A friend of mine used to say that she would go to bed and wake up with her stomach bigger - and I totally believer her! I didn't grow so much for several weeks - maybe even about a month and a half, and then all of a sudden - there was my little baby poking out!


I've still been running on most days of the week, and my running partner Laura and I started incorporating some weight training which has been a nice change of pace to the running - and always feeling out of breath! :)

I looked in the kids section of H&M this weekend, and decided that my little guy must always be dressed in H&M clothes... they are so cute! I mean seriously! And they are super cheap too!


Okay, enough about babies and bellies... here's a yummy recipe. And a great way to make your own red lipstick! :) Puppy chow was one of my favorite treats when I was a kid, and now there are so many adaptions to this recipe now. I just found a new one for one using cake mix in the recipe for cake batter puppy chow. And then.... there was another using red velvet cake mix, and cream cheese frosting! YUM! The only downfall.... when your fingers get wet from licking them, it turns your lips and fingers red! haha. Oh well, it's totally worth it. 
 
Red Velvet Puppy Chow (adapted from Unbearably Good)


Ingredients: 
1 cup cream cheese frosting
5 cups Chex cereal
1 cup boxed red velvet cake mix
1/2 cup powdered sugar

Preparation: 

1. Melt frosting in a small bowl in the microwave for 15 seconds. 


2. Place Chex cereal in a large mixing bowl. Pour frosting over Chex cereal and combine until well blended. 


3. In a separate small bowl, combine the 1 cup red velvet cake mix and powdered sugar until combined.


4. Pour in small batches into the Chex and frosting mixture, combining often with a spatula until all sugar mixture is incorporated. 


5. Refrigerate ~10-15 minutes or until frosting is hardened.  


Read more...